Maintenance of Aluminum Profile Processing Equipment
Blade Maintenance:
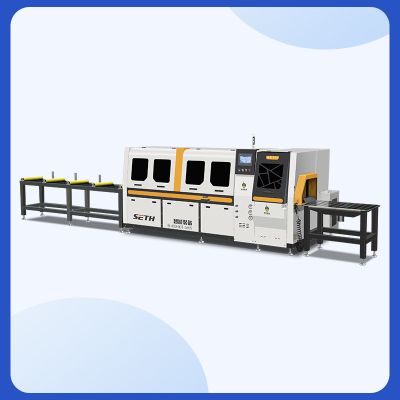
Inspect the tungsten carbide-tipped (TCT) blade daily for wear, chipping, or dullness. Replace the blade if there are visible defects—dull blades can cause rough cuts, increase energy consumption, and damage the aluminum profile surface.
Clean the blade after each shift using a specialized blade cleaner (avoid water or corrosive solvents) to remove aluminum chips and debris, which can accumulate and affect cutting precision.
Sharpen the blade every 50–100 hours of operation (depending on usage frequency) using a professional blade sharpener. Ensure the sharpening angle matches the blade’s original design (typically 15–20 degrees for aluminum cutting).
Mechanical and Electrical Maintenance:
Lubricate the automatic feeding system (e.g., conveyor belts, gearboxes) weekly with high-temperature resistant lubricating oil to prevent friction-induced wear.
Check the electrical connections (e.g., power cords, motor wires) monthly for looseness or damage. Tighten loose connections and replace damaged wires immediately to avoid electrical malfunctions.
Calibrate the cutting length sensor quarterly using a standard measuring tool (e.g., a precision ruler) to ensure consistent cutting dimensions—misaligned sensors can lead to product waste.
Blade Care:
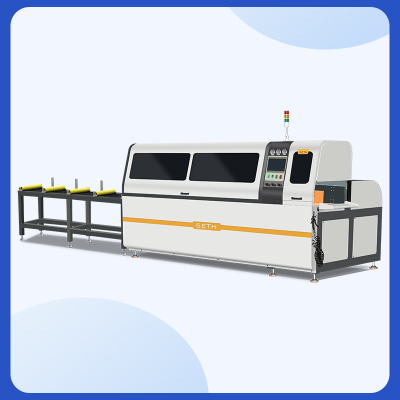
Inspect the band saw blade’s tension daily—too loose a blade causes vibration and inaccurate cuts, while over-tensioning can lead to blade breakage. Adjust the tension according to the blade’s thickness and the manufacturer’s recommendations.
Clean the blade guides (which support the blade during cutting) after each use to remove aluminum dust. Lubricate the guides with dry lubricant (to avoid attracting dust) weekly.
Cooling System Maintenance:
Many band saw machines use coolant to reduce heat during cutting. Check the coolant level daily and top up with a water-soluble coolant (specifically formulated for aluminum) when necessary.
Replace the coolant every 3–6 months (or as per the manufacturer’s advice) to prevent bacterial growth, which can degrade coolant performance and cause corrosion to the machine’s metal parts.
Laser/Plasma Head Maintenance:
For laser cutting machines: Clean the laser lens weekly using a lens cleaning kit (including lens paper and non-alcoholic cleaner) to remove dust and debris—dirty lenses reduce laser power and cause uneven cuts. Check the lens for scratches monthly; replace it if damaged.
For plasma cutting machines: Inspect the plasma torch tip daily for wear or clogging. Replace the tip if there are signs of erosion (e.g., irregular flame shape) to ensure stable plasma arc formation.
Software and Calibration:
Back up the CNC control software monthly to prevent data loss due to system failures. Update the software annually (or as per the manufacturer’s updates) to access new features and bug fixes.
Calibrate the machine’s X/Y/Z axes quarterly using a precision calibration tool (e.g., a laser interferometer) to maintain positioning accuracy—even minor misalignments can ruin high-precision cuts for aerospace or electronic components.
Hydraulic System Maintenance:
Check the hydraulic oil level daily and ensure it meets the recommended level (indicated on the oil tank). Add hydraulic oil (grade ISO 46 or 68, as per the machine’s specs) if needed—low oil levels can cause the hydraulic press to operate inefficiently or fail.
Replace the hydraulic oil filter every 3 months and the hydraulic oil every 6–12 months (depending on usage). Contaminated oil (with metal particles or debris) can damage the hydraulic pump and valves, leading to costly repairs.
Inspect the hydraulic hoses monthly for cracks, leaks, or bulges. Replace damaged hoses immediately to prevent oil leaks and ensure safe operation.
Heating System Maintenance:
Check the temperature sensors (e.g., thermocouples) of the billet heating chamber weekly for accuracy. Use a calibrated temperature meter to verify the sensor readings—incorrect temperatures can result in under-softened or overheated billets, which affect extrusion quality.
Clean the heating elements (e.g., electric coils) monthly to remove aluminum oxide deposits, which can insulate the elements and reduce heating efficiency.
Temperature Uniformity Check:
Test the oven’s temperature uniformity quarterly using a portable temperature data logger placed at multiple points inside the oven. Ensure the temperature variation is within ±5°C of the set value (300–400°C for extrusion dies)—uneven heating can cause die deformation and defective profiles.
Oven Interior Cleaning:
Clean the oven’s interior (walls, shelves) every month to remove accumulated aluminum dust and oxide. Use a soft brush or vacuum cleaner (with a HEPA filter) to avoid scratching the oven’s heat-resistant coating.
Water Quenching Tanks:
Check the water level daily and add clean water if necessary. Test the water pH weekly (aim for a neutral pH of 6.5–7.5) using a pH test kit. Add a corrosion inhibitor (as per the manufacturer’s recommendation) monthly to prevent rust in the tank and on the aluminum profiles.
Clean the tank’s filter (which removes aluminum chips) weekly to maintain water flow and cooling efficiency. Drain and replace the water every 2–3 months to avoid bacterial growth and mineral buildup.
Air Cooling Conveyors:
Inspect the conveyor belts weekly for wear or misalignment. Adjust the belt tension if it slips and replace the belt if there are cracks or fraying.
Clean the air vents and fans monthly to remove dust and debris, which can block airflow and reduce cooling speed.
Anodizing Tanks and Electrolyte Maintenance:
Check the electrolyte solution (e.g., sulfuric acid) concentration weekly using a hydrometer. Adjust the concentration by adding acid or water to maintain the recommended range (15–20% for decorative anodizing).
Remove aluminum sludge (deposited at the tank bottom) monthly using a sludge pump. Excess sludge can contaminate the electrolyte and cause uneven oxide layer formation.
Inspect the tank’s acid-resistant lining (e.g., PVC or rubber) quarterly for cracks or peeling. Repair or replace the lining immediately to prevent acid leaks, which can damage the tank structure and pose safety hazards.
Rectifiers and Sealing Ovens:
Test the rectifier’s current output monthly using a clamp meter to ensure it matches the set value. Clean the rectifier’s heat sinks weekly to prevent overheating.
For sealing ovens: Check the temperature controller weekly for accuracy. Clean the oven’s heating elements monthly to remove oxide deposits, which can reduce heating efficiency.
Spray Guns and Powder Feed Systems:
Disassemble and clean the electrostatic spray gun nozzles daily to remove dried powder, which can clog the nozzle and cause uneven coating. Use compressed air (at low pressure) to blow out powder residues.
Inspect the powder hopper (which stores the dry powder) weekly for moisture—moist powder can form clumps and affect coating quality. Add a desiccant (e.g., silica gel) to the hopper if moisture is detected.
Curing Ovens:
Clean the oven’s interior (walls, conveyor rails) monthly to remove oversprayed powder, which can burn and leave stains on the coated profiles. Use a scraper (for hard residues) and a vacuum cleaner.
Check the oven’s conveyor speed monthly and calibrate it to match the curing time (typically 15–30 minutes at 180–220°C). Incorrect speed can lead to under-cured or over-cured coatings.
Paint Bath Maintenance:
Check the paint bath’s temperature (typically 20–25°C) and pH (7.5–8.5) daily. Adjust the temperature using a cooling/heating system and the pH using a buffer solution to maintain stable coating conditions.
Filter the paint bath weekly using a fine-mesh filter (5–10 μm) to remove impurities (e.g., aluminum particles), which can cause defects in the coating (e.g., pinholes or unevenness).
Electrode Maintenance:
Clean the electrodes (which supply current to the paint bath) monthly to remove paint deposits. Use a soft cloth dipped in a mild solvent (approved by the paint manufacturer) to avoid damaging the electrode surface.
Tool Maintenance:
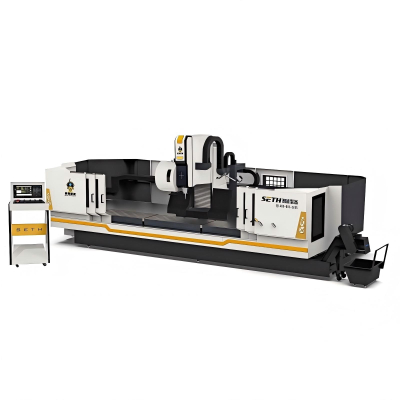
Inspect the milling cutters (e.g., end mills, face mills) daily for wear, chipping, or dullness. Replace worn cutters—dull cutters can cause chatter (vibration) and reduce machining accuracy.
Store unused cutters in a dry, cool place (preferably in a tool cabinet with anti-rust oil) to prevent corrosion.
Mechanical and Lubrication Maintenance:
Lubricate the machine’s linear guides and ball screws daily using a high-quality lubricant (e.g., lithium-based grease) to reduce friction and prevent wear. Most modern CNC machines have an automatic lubrication system—check the lubricant level weekly and refill if needed.
Clean the machine’s chip conveyor daily to remove aluminum chips and debris, which can jam the conveyor and damage the machine’s moving parts.
Drill Bit Care:
For CNC drilling centers: Inspect the drill bits daily for wear or breakage. Use a tool length sensor to check the bit’s length accuracy weekly—worn bits can drill holes of incorrect depth.
For manual drilling machines: Sharpen the drill bits every 20–30 hours of operation using a drill bit sharpener. Ensure the sharpening angle (typically 118 degrees for aluminum) is consistent.
Spindle Maintenance:
Check the spindle’s runout (vibration) monthly using a dial indicator. If runout exceeds 0.01 mm, adjust or replace the spindle bearings to prevent inaccurate drilling.
Lubricate the spindle bearings every 3 months with high-temperature grease (suitable for spindle speeds up to 10,000 RPM).
Tap Maintenance:
Inspect the taps (threaded tools) daily for wear or damage to the threads. Replace taps if the threads are dull or chipped—damaged taps can create faulty threads that fail to hold fasteners.
Apply tapping fluid (specifically formulated for aluminum) to the tap during operation to reduce friction and extend tap life. Clean the taps after use to remove aluminum chips and tapping fluid residues.
Clamping System Maintenance:
Check the workpiece clamping fixtures (e.g., vises) weekly for tightness. Tighten loose fixtures to prevent the workpiece from shifting during tapping, which can damage the tap and the aluminum profile.
Cleaning and Inspection:
Clean the jigs and fixtures daily using a damp cloth to remove aluminum dust and debris, which can affect the alignment of profiles during assembly.
Inspect the jig’s positioning pins and clamps weekly for wear or deformation. Replace worn components to maintain assembly accuracy—misaligned jigs can lead to ill-fitting products.
Pneumatic Riveters:
Check the air pressure daily (typically 60–90 PSI) using a pressure gauge. Adjust the pressure if needed—low pressure can cause incomplete rivet setting, while high pressure can damage the riveter.
Lubricate the riveter’s air cylinder weekly with pneumatic tool oil to prevent rust and ensure smooth operation.
Electric Screwdrivers:
Test the torque setting weekly using a torque wrench to ensure it matches the required torque for the fastener (typically 0.5–5 N·m for aluminum profiles). Incorrect torque can lead to loose or over-tightened screws.
Clean the screwdriver’s bit holder monthly to remove dust and debris, which can cause the bit to slip.
Adhesive Dispensers:
Clean the dispenser’s nozzle daily to remove dried adhesive, which can clog the nozzle and cause uneven adhesive application. Use a solvent recommended by the adhesive manufacturer for cleaning.
Check the adhesive level in the tank daily and refill as needed. Store unused adhesive in a cool, dry place (as per the product’s storage instructions) to prevent curing.
Abrasive Belt Polishers:
Inspect the abrasive belt daily for wear or tearing. Replace the belt if the grit becomes dull—worn belts can leave scratches on the aluminum surface.
Adjust the belt tension weekly to ensure it stays in place during polishing. Too loose a belt causes slippage, while over-tensioning can damage the belt and the machine’s rollers.
Vibratory Deburring Machines:
Check the media (e.g., ceramic or plastic pellets) level weekly and add more media if needed—insufficient media reduces deburring efficiency.
Clean the machine’s interior monthly to remove aluminum fines (small metal particles) that can accumulate and contaminate the media. Replace the media every 6–12 months (depending on usage) to maintain deburring quality.
Create a Maintenance Schedule: Develop a detailed monthly/quarterly/annual maintenance checklist for each piece of equipment, and assign dedicated staff to perform and document maintenance tasks.
Train Operators: Provide regular training to equipment operators on basic maintenance (e.g., daily cleaning, blade inspection) and safe operation—untrained operators are more likely to cause equipment damage.
Store Spare Parts: Keep a stock of critical spare parts (e.g., blades, filters, hydraulic hoses) on hand to minimize downtime when repairs are needed.
Conduct Annual Inspections: Hire professional technicians to perform a comprehensive annual inspection of all equipment, including structural integrity, electrical safety, and performance testing.


